
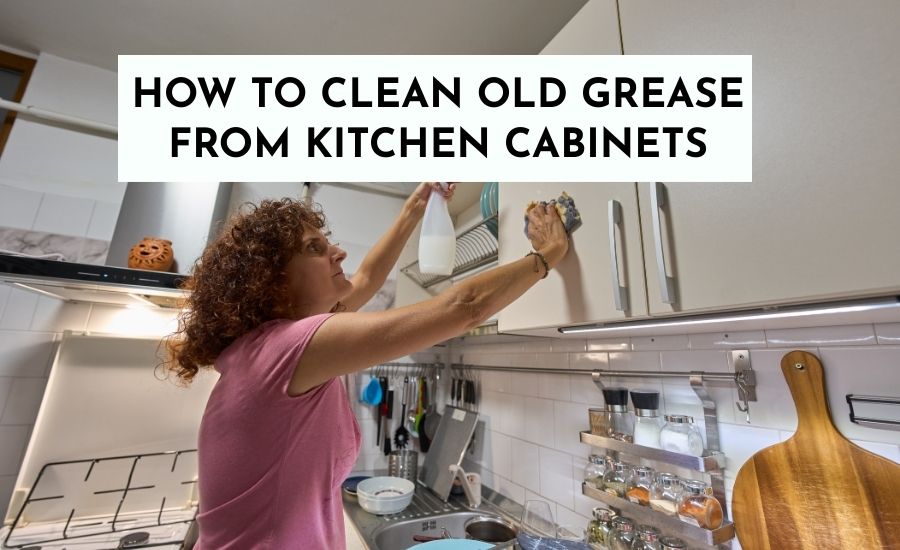
If you’ve ever tried to wipe down kitchen cabinets that haven’t been deep-cleaned in a while, you already know the frustration. That sticky, brownish film seems almost glued on, and in a way, it is. Understanding why old grease behaves the way it does makes the entire cleaning process much less baffling. In this blog post, I have detailed a step-by-step process on how to clean old grease from kitchen cabinets.
Every time you cook, tiny droplets of oil and fat float into the air and quietly settle on every nearby surface, including your cabinet doors. On their own, these droplets are harmless. But over time, they don’t just sit there.
Cooking oils undergo a chemical process called polymerization, in which heat causes oil molecules to bond together into longer, stickier chains. What starts as a light, oily film gradually hardens into a thick, varnish-like residue that bonds stubbornly to wood, paint, and laminate.
Disclaimer: This post contains affiliate links, meaning I may get compensated without extra cost if you buy something through my link. Read the full disclosure here.
Fresh grease VS years-old buildup
Fresh grease is easy to handle with a warm, damp cloth. But grease that’s been sitting for months or years is a completely different animal. It’s no longer just oil, it’s essentially a hardened polymer coating.
That’s why a simple wipe-down barely touches it, and why you need something with real degreasing power to break those chemical bonds apart.
Here’s where people often make things worse. Frustrated by how stubborn the grease is, it’s tempting to grab a rough scrubbing pad and go at it. But aggressive scrubbing can scratch painted surfaces, strip away the protective finish on wood, and leave dull, uneven patches that are impossible to reverse.
11 ways To Get Rid Of Bad Smell In Kitchen Sink
Clean old grease from kitchen cabinets
Here are the steps you will need to start to clean old grease from kitchen cabinets. Follow these, and you will have clean, shiny cabinets after a buildup of years or months.
Cleaning Supplies You’ll Need
Getting your supplies together before you dive in is one of those small things that makes a big difference. There’s nothing more annoying than having your hands covered in greasy residue and realizing you left the vinegar in the pantry.
Basic Cleaning Supplies
The good news is that most of what you need is probably already in your kitchen or bathroom cabinet. You’ll want a few microfiber cloths, these are genuinely worth using over paper towels because they trap grease rather than just pushing it around.
Grab some warm water and a bottle of mild dish soap, which is already formulated to cut through grease and works beautifully on cabinet surfaces. Baking soda is your gentle abrasive for stubborn patches, and white vinegar is a natural degreaser that does surprisingly heavy lifting for something so cheap.
Fill up a spray bottle with your cleaning solution so you can apply it evenly without soaking the wood, and keep a soft-bristle brush or old toothbrush handy for getting into grooves, corners, and decorative trim where grease loves to hide.
Optional Heavy-Duty Helpers
If you’re dealing with years of built-up grime rather than just a seasonal clean, you may want to bring in some reinforcements. A degreaser specifically formulated for safe use on wood cabinets can save you a lot of elbow grease. Just always check the label before applying it to your finish.
Murphy’s Oil Soap is a longtime favorite for wood surfaces because it cleans effectively without drying out or damaging the grain.
And if you want something purpose-built for the job, a commercial kitchen cabinet cleaner is worth having on hand for the worst patches.
One quick tip before you start: always test any cleaning solution on a hidden spot first, like the inside of a cabinet door. Cabinet finishes vary widely, and what works perfectly on one surface can dull or discolor another. A thirty-second test can save you a very expensive headache.
How To Keep Your Kitchen Smelling Good
Step 1: Test a Hidden Spot First
This is the step most people skip, and it’s exactly the one that comes back to bite them. It takes less than two minutes, and it could be the difference between beautifully clean cabinets and a blotchy, damaged finish you’ll be staring at for years.
Cabinet finishes are not created equal. Some are sealed with a tough polyurethane coating that can handle most cleaning solutions without flinching. Others have a thin paint layer, a delicate stain, or a laminate veneer that reacts badly to acidic or alkaline cleaners.
Vinegar, for instance, is mildly acidic, fantastic at breaking down grease, but can dull certain finishes with repeated use. Baking soda is gently abrasive, helpful on stubborn spots, but potentially too harsh for soft or painted surfaces.
How to Test Properly
Pick a spot that’s out of sight, like the inside face of a cabinet door, the back panel near the hinges, or a low corner that’s tucked away. Apply a small amount of your chosen cleaning solution to a microfiber cloth rather than spraying it directly onto the surface. Gently wipe the area with the same pressure you’d use during the actual cleaning.
Let it sit for the amount of time you’d normally leave the solution on, then wipe it away with a clean, damp cloth and let it dry completely before making any judgments.
Once the test spot is fully dry, inspect it closely in good lighting, natural light works best. You’re looking for any change in color, sheen, or texture compared to the surrounding area.
If the finish looks dull, feels tacky, shows any lifting or bubbling, or the color has shifted even slightly, that particular cleaner isn’t the right fit for your cabinets.
25 Cleaning Hacks That Will Change Your Life- Practical Tips
Step 2: Start With Warm Soapy Water
Warm soapy water is the unsung hero of cabinet cleaning, and you’d be surprised how much it can handle on its own, even on grease that looks pretty intimidating. It’s gentle enough not to risk your finish, and dish soap was literally designed to cut through cooking grease, so give it a real chance before escalating to heavier solutions.
Mix a few drops of mild dish soap into a bowl or spray bottle of warm water, not hot, just comfortably warm.
Hot water can cause wood to expand or warp over time, and it’s no more effective at dissolving grease than warm water is. You want just enough soap to create a light, sudsy solution.
Too much soap leaves a residue of its own that attracts dust and makes your cabinets look streaky, which defeats the whole purpose. Think of it as a light lather rather than a bubble bath.
Proper Cleaning Technique: Don’t Soak Your Cabinets
This is where many people unintentionally cause damage. Wood and moisture are not friends, and even cabinets with a sealed finish can suffer if water seeps into the edges, seams, or corners.
Dip your microfiber cloth into the solution and then wring it out thoroughly it should feel damp, not wet. You never want water dripping down the cabinet face or pooling along the bottom edge of a door.
Work in small sections rather than tackling an entire cabinet run at once, and keep a dry cloth nearby to follow up immediately after each section. The less time moisture spends sitting on the surface, the better.
How to Wipe Without Spreading Grease
Here’s a technique tweak that makes a noticeable difference. Instead of wiping back and forth in long strokes, which just moves grease from one spot to another, use a gentle circular motion and work from the outside of a greasy patch inward.
This prevents the residue from dragging across clean areas and gives the soap a chance to actually lift and trap the grease in the cloth fibers.
Flip your microfiber cloth frequently so you’re always working with a clean section, and don’t be tempted to keep rubbing with a cloth that’s already loaded with grease. Swap it out, rinse it, and keep going with a fresh surface.
Fastest Way To Clean Your Kitchen When You Are Exausted
Step 3: Use Baking Soda for Thick, Sticky Grease
So you’ve gone over your cabinets with warm, soapy water, and there are still patches that won’t budge, that dark, sticky buildup that almost looks like it’s been varnished on. This is where baking soda earns its reputation.
Why Baking Soda Works on Old Grease
Baking soda works through a combination of mild alkalinity and gentle abrasion. As an alkaline substance, it reacts chemically with the fatty acids in grease, helping break down the hardened, polymerized bonds we discussed earlier and, at the molecular level, loosening the grease’s grip on the surface.
At the same time, its fine granular texture acts like an ultra-gentle scrub, lifting residue without being aggressive enough to scratch most cabinet finishes.
It’s that rare combination of chemical and physical cleaning action working together, which is exactly why it handles old grease so much better than soap alone.
How to Make a Gentle Paste
Making the paste is simple. Add baking soda to a small bowl and drizzle in just enough water to bring it together into a thick, spreadable consistency, think toothpaste rather than pancake batter.
You want it substantial enough to stay put on a vertical surface without sliding straight down. If you want to boost its grease-cutting power a little, you can substitute a few drops of dish soap for some of the water.
How Long to Let It Sit
Apply the paste directly to the greasy area with your fingers or a soft cloth, spreading it in a thin, even layer over the affected spot. Then, and this is the part people tend to rush, let it sit.
For moderately stubborn grease, give it around five minutes. For thick, years-old buildup that’s almost shellac-like in texture, let it rest for ten to fifteen minutes. This dwell time is doing real work.
Skipping this step and going straight to scrubbing is like trying to wash dishes without letting them soak, you’re just making things harder for yourself.
Safe Scrubbing Technique
Use a soft-bristle brush or an old toothbrush for textured surfaces, grooves, and detailed trim, the bristles get into spots a cloth simply can’t reach. For flat surfaces, a damp microfiber cloth works perfectly. Use small, gentle circular motions and let the paste do the heavy lifting rather than applying a lot of pressure.
If you feel yourself bearing down hard, stop, that’s a sign the grease needs more dwell time, not more force. Work through the area gradually, rinsing your cloth or brush frequently, and finish by wiping the entire surface with a clean, damp cloth to remove every trace of baking soda residue.
Follow immediately with a dry cloth, because, as always, you don’t want moisture sitting on your cabinets any longer than necessary.
How To Declutter A Room In One Day
Step 4: Vinegar Solution for Cutting Through Residue
After the baking soda treatment, most of that heavy buildup should be gone. But sometimes there’s still a thin, hazy film left behind, that slightly tacky, dull-looking layer that makes your cabinets look grimy even after cleaning. This is where a vinegar solution steps in to finish the job.
When to Use Vinegar and When Not To
White vinegar is a mild acid, and that acidity is precisely what makes it so good at dissolving greasy residue and leaving surfaces streak-free. It’s ideal for sealed cabinets, painted surfaces with a solid finish, and laminate or thermofoil cabinet fronts where the surface is non-porous and well-protected. However, if your cabinets are made of natural, unsealed wood, have a wax finish, or are finished with certain oil-based stains, vinegar can be genuinely damaging.
Similarly, if your cabinets have any stone elements or decorative hardware with a brushed metal finish, keep the vinegar away from those entirely. When in doubt, go back to your test spot and try the diluted solution there first before committing to the full surface.
Correct Dilution Ratio
The sweet spot is a simple one-to-one ratio of white vinegar to warm water. Mix equal parts in your spray bottle, give it a gentle shake, and you have a perfectly balanced solution that’s strong enough to cut through residue without being aggressive enough to threaten your finish.
How to Avoid Damaging Your Wood Finish
Application technique matters just as much as dilution here. Never spray the vinegar solution directly onto the cabinet surface, always spray it onto your microfiber cloth first.
Wipe in the direction of the wood grain using light, even strokes, and don’t let the solution sit on the surface for longer than a minute or two. Vinegar’s acidity continues to work as long as it’s in contact with the surface, so the longer it lingers, the greater the risk.
Once you’ve wiped the area, immediately follow with a clean cloth dampened with plain water to neutralize any remaining acid, then dry the surface thoroughly.
13 Reasons Your Home Still Looks Dirty and How to Fix
Step 5: Try a Store-Bought Degreaser (If Needed)
Let’s be real, sometimes you’re dealing with cabinets that haven’t seen a proper cleaning in a very long time, and no amount of baking soda paste or vinegar solution is going to fully cut through what’s built up on them. There’s no shame in reaching for a commercial degreaser when the situation genuinely calls for it.
Natural methods are excellent for maintenance cleaning and moderate buildup, but years of polymerized grease sometimes needs a purpose-formulated product to fully dissolve it.
How to Choose the Right Product
Not all degreasers are created equal, and picking the wrong one for your cabinet material can cause real damage. The key phrase to look for on the label is “safe for wood” or “suitable for painted surfaces”, this tells you the formula has been balanced to clean effectively without stripping finishes or drying out wood.
Murphy’s Oil Soap is a reliable and widely available option that’s gentle enough for most wood finishes while still being a genuinely effective cleaner. For tougher jobs, look for plant-based or citrus-based degreasers, which tend to be powerful yet less chemically aggressive than solvent-based alternatives.
Household Hacks With Murphy’s Oil Soap
What to Avoid
Avoid any cleaner that contains bleach or ammonia. Both are far too harsh for wood and painted surfaces and can cause discoloration, finish breakdown, and long-term structural damage to the wood itself.
Steer clear of anything marketed primarily as a heavy-duty industrial or oven degreaser, as these are formulated for non-porous surfaces like metal and glass and are simply too aggressive for kitchen cabinetry.
On the physical side, never use steel wool, abrasive scouring pads, or stiff wire brushes, regardless of how stubborn the grease feels. Stick with microfiber cloths and soft-bristle brushes, they’re more than capable when paired with the right cleaning product.
Proper Ventilation Tips
Before you start, open your kitchen windows and turn on your range hood fan if you have one. If your kitchen doesn’t have great airflow, position a fan to push air toward an open window rather than just circulating it around the room.
Take regular breaks to step out of the kitchen and breathe fresh air, especially if you notice any eye irritation or lightheadedness. Keep children and pets out of the kitchen while you’re working, and store all products securely once you’re done.
15 Simple Things To Do Every Day To Keep Your Home Clean
Step 6: Cleaning Cabinet Hardware and Handles
Handles and hardware are often the most neglected part of the cabinet-cleaning process, and ironically, they’re the dirtiest of all. Every single time someone opens a cabinet, they’re transferring the oils from their hands directly onto that handle.
Why Handles Hold the Most Grease
It’s a combination of factors that makes hardware such a grease magnet. Direct hand contact deposits skin oils and cooking residue constantly throughout the day, and unlike flat cabinet surfaces, handles have curves, edges, screws, and decorative detailing that trap buildup in spots that are nearly impossible to reach with a regular cloth.
Easy Soak Method
If your hardware is removable, taking it off the cabinets before cleaning is absolutely the way to go. It gives you access to every surface, including the back plate and screw holes, so you can really let the cleaner do its work without worrying about drips running down the cabinet face.
Fill a bowl or your kitchen sink with warm water and a generous squirt of dish soap, drop the hardware in, and let it soak for fifteen to twenty minutes. For handles with particularly stubborn buildup, add a tablespoon of baking soda to the soaking water.
After soaking, use an old toothbrush to work into the grooves, screw holes, and any decorative detailing where residue has collected. Rinse each piece thoroughly under warm running water and lay them on a clean towel to dry completely before reattaching them.
For hardware that can’t be removed, apply a small amount of dish soap solution to a toothbrush and scrub carefully around all the edges and crevices, then wipe clean with a damp cloth and dry immediately.
Polishing After Cleaning
Once your hardware is clean and completely dry, a quick polish makes a noticeable difference and helps protect the finish going forward. For chrome and stainless steel handles, a small amount of mineral oil buffed in with a soft cloth restores the shine and leaves a light protective layer that slows future grease buildup.
Brass hardware responds beautifully to a tiny dab of metal polish applied with a soft cloth and buffed in circular motions. Just make sure the polish is appropriate for your specific finish, as lacquered brass requires different treatment than unlacquered brass. For oil-rubbed bronze, skip the polish entirely and simply buff with a dry microfiber cloth, as polishing products can strip the distinctive dark patina that gives this finish its character.
Step 7: Don’t Forget the Top of Cabinets
If there’s one spot that gets skipped every single time, it’s the top of the cabinets. Out of sight, out of mind, until you finally get up there and discover what can only be described as a grease museum. Because heat and cooking vapors rise, the top of your cabinets collects the heaviest, stickiest accumulation in the entire kitchen.
Best Tools for Reaching High Spots
A step stool or small ladder is non-negotiable here, don’t try to stretch or reach blindly. Lay down some old newspaper or paper towels on top of the cabinets first if the buildup is extreme, then remove them along with the worst of the debris before you start cleaning.
Preventing Future Buildup
Line the top of your cabinets with shelf liner paper or even fresh newspaper, when grease builds up, you just swap it out rather than scrubbing.
Step 8: Rinse and Dry Properly
Getting the cleaning solution off your cabinets properly is just as important as the cleaning itself. A lot of people do a thorough job of scrubbing away grease, only to undo half their work by not rinsing well enough.
Soap residue, in particular, leaves a slightly tacky film that airborne grease particles love to stick to. Baking soda residue left in grooves and corners creates a chalky buildup that’s genuinely difficult to remove later. Even vinegar, if not fully wiped away, can continue acting on your finish long after you’ve moved on.
How to Dry Without Streaking
The secret to a streak-free finish is simple, use a clean, dry microfiber cloth and wipe in the direction of the wood grain rather than in circles. Buff gently rather than rubbing hard, and flip the cloth frequently so you’re always working with a dry section.
How To Restore Shine After Removing Old Grease
Once all that built-up grease is finally gone, you might notice your cabinets looking a little dull or worn, and that’s completely normal. Years of grease accumulation and the cleaning process itself can strip some of the natural moisture and sheen from the surface.
Conditioning Wood Cabinets
Real-wood cabinets benefit greatly from conditioning after a deep clean. A good wood conditioner, applied with a soft cloth in the direction of the grain and left to absorb for ten to fifteen minutes before buffing away the excess, restores that depth and warmth to the wood that grease buildup had been quietly hiding for years. Howard Feed-N-Wax is a widely trusted option that works well on most finished wood surfaces without leaving a greasy residue behind.
Using Oil-Based Wood Polish Safely
Oil-based polishes can do a beautiful job of restoring shine, but a little goes a long way, applying too much leaves a sticky film that attracts dust almost immediately. Always check that your chosen polish is compatible with your specific finish, particularly if your cabinets have a polyurethane or lacquer coating, as some oil-based products can cloud these finishes with repeated use.
When Cabinets May Need Repainting
Sometimes a deep clean reveals that the cabinets themselves are in worse shape than the grease was hiding.
If you’re seeing widespread discoloration that cleaning hasn’t resolved, areas where the finish has worn completely through to bare wood, conditioning and polishing won’t be enough.
At that point, a fresh coat of paint or a professional refinishing job is genuinely the better investment.
How To Prevent Grease Buildup in the Future
Once you’ve finally removed old grease from your kitchen cabinets, the last thing you want is to deal with that sticky mess again. The good news? Preventing grease buildup is much easier than removing years of grime.
It all comes down to small, consistent habits. You don’t need hours of scrubbing — just a smart routine.
Simple Weekly Habits
Grease builds up slowly. You don’t notice it at first. But week after week, cooking oils mix with dust and turn into that stubborn film.
A simple weekly routine keeps cabinets from ever reaching that point again.
- Wipe cabinet doors lightly once a week
- Focus on areas near the stove
- Check handles and knobs
- Don’t forget the lower cabinets (splatter travels!)
This takes less than 10 minutes but saves you from a deep-clean nightmare later.
Quick Wipe-Down Routine
This is your secret weapon.
After regular cooking days, especially when frying or sautéing, do a fast wipe-down:
- Dampen a microfiber cloth with warm water and a drop of dish soap.
- Wring it out well, cabinets should never be soaked.
- Gently wipe cabinet fronts near the cooking area.
- Follow with a dry cloth to remove moisture.
This simple habit prevents grease from settling and turning sticky. Fresh splatter wipes away easily. Old grease? Not so much.
Think of it like brushing your teeth, small daily care prevents bigger problems.
Cleaning After Heavy Cooking
If you’ve had a big cooking day, frying fish, cooking curries, making bacon, or hosting a family dinner, grease particles are floating in the air. They eventually land on cabinets.
On those days, take five extra minutes:
- Wipe cabinets around the stove and range hood
- Clean backsplash surfaces
- Check the underside of upper cabinets
- Clean cabinet handles thoroughly
The sooner you remove grease, the easier it comes off.
Waiting even a few days allows it to thicken and bond with dust.

Monthly Deep Clean Tips
Even with weekly care, cabinets benefit from a light monthly refresh.
This doesn’t mean scrubbing aggressively. It means being intentional.
- Use warm water and mild dish soap
- Clean the entire cabinet surface, not just visible spots
- Pay attention to corners and grooves
- Wipe the top edges of cabinet doors
- Check the top of cabinets if they don’t reach the ceiling
A monthly cleaning keeps buildup from layering.
Best Maintenance Schedule
If you like structure, here’s a simple system that works:
Weekly:
Quick wipe-down of cabinet fronts near the stove.
After heavy cooking:
Targeted cleaning of splatter zones and handles.
Monthly:
Full cabinet surface clean with a gentle soap solution.
Every 3–6 months:
Check cabinet tops, polish wood (if applicable), and inspect finish condition.
When you stick to this rhythm, grease never gets the chance to harden into that stubborn film again.
Protecting Cabinets Near the Stove
Cabinets closest to your stove face the most grease exposure.
Here’s how to protect them:
- Always use your range hood or exhaust fan while cooking. Ventilation reduces airborne grease dramatically.
- Clean or replace range hood filters regularly. Clogged filters push grease back into your kitchen.
- Consider installing a splatter guard when frying.
- Wipe down nearby cabinet surfaces more frequently than others.
If possible, keep frequently used oils and seasonings slightly away from cabinet doors to prevent drips.
The cabinets next to your stove need extra attention, but a little prevention goes a long way.
- Random Cleaning hacks for a spotless home For Busy People
- 29 Easy Decluttering Tips For Moms to Simplify Your Home
- How To Use 12-12-12 Decluttering Method To Decluter Your House
- 30 things To Plan and Organize for Christmas: A Comprehensive Holiday Checklist
- How To Stop Clutter Coming Back? Why It Returns?